
Cheeseburger quesadillas combine browned ground beef, cheddar, onion, and optional pickles inside crisp folded tortillas. A quick burger sauce goes alongside for dipping, giving each wedge the familiar sweet-tangy flavor of a cheeseburger without needing to shape patties or prepare buns.
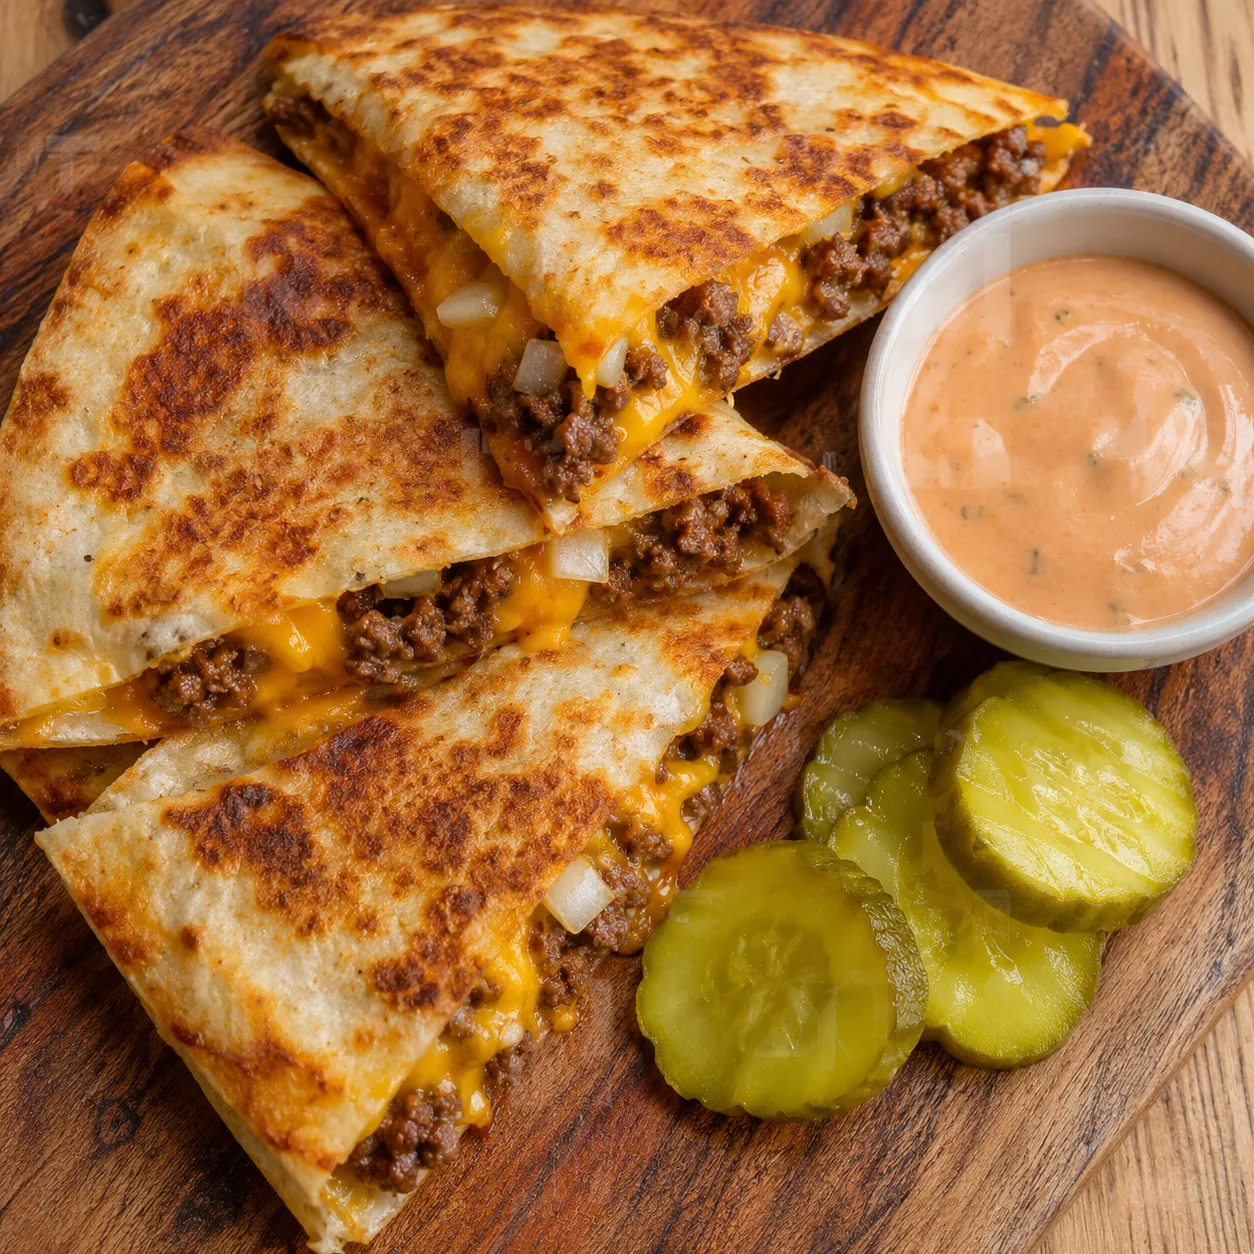
This original recipe draft makes four large folded quesadillas, enough for four main-course portions with a side. Allow about 35–40 minutes when cooking two at a time in a wide skillet. If your pan holds only one, plan extra time for the remaining batches. The beef filling is cooked first so you can focus on crisp tortillas and melted cheese during assembly.
Jump to the recipe · Keep the tortillas crisp · Frequently asked questions
Why cook the beef before filling the tortillas?
Cooking the beef separately lets you drain excess fat and soften the onion before the tortillas reach the pan. It also makes it easier to divide the filling evenly. The final skillet stage then heats an already cooked filling and melts cheese rather than trying to cook raw meat through a sealed tortilla.
The filling should be moist but not wet. A little ketchup and mustard provide burger flavor, while a large quantity of sauce would soak into the tortilla. Most of the creamy burger sauce stays in a separate dipping bowl. Pickles are optional inside; draining and blotting them prevents extra brine from turning the center soggy.
Choose ingredients for a crisp result
Ground beef and onion
Use about one pound of lean ground beef, ideally around 90% lean. A fattier blend can work if drained carefully. Break it into small crumbles as it browns so there are no large lumps holding the tortilla open. Finely diced onion softens more evenly than thick pieces and distributes through the filling.
Tortillas that fold without cracking
Four soft 10-inch flour tortillas provide enough space for the filling. Warm stiff tortillas briefly before folding so they bend easily. Smaller tortillas work too, but you will need more of them and less filling per piece. Corn tortillas have a different size and structure, so do not assume the same large folded format will behave identically.
Cheddar and optional pickles
Freshly grated cheddar spreads evenly and melts comfortably over moderate heat. A cheddar–Monterey Jack blend gives a milder flavor and stretchier texture. Choose dill pickles rather than sweet relish if you want a sharper burger-style bite. Cut them small, then blot well; keep extra slices outside for anyone who prefers a plain filling.
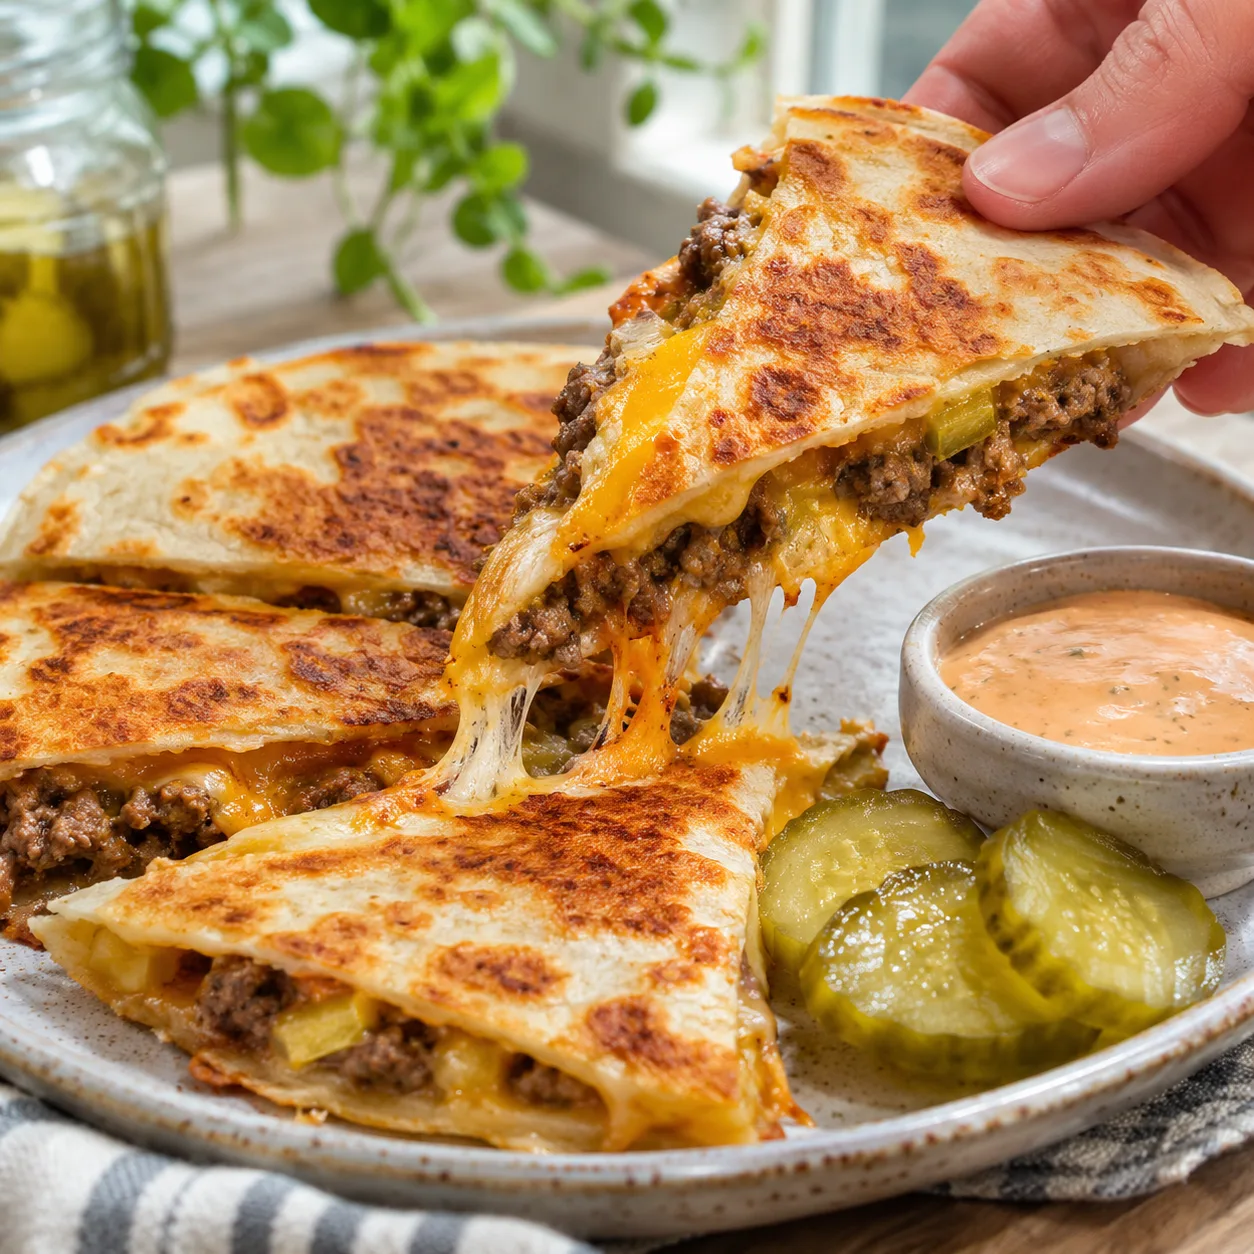
Cheeseburger Quesadillas Recipe
Yield: 4 large folded quesadillas, 12 wedges · Prep: 10 minutes · Cook: about 25–30 minutes in two batches · Total: about 35–40 minutes.
Equipment: wide skillet or griddle, spatula, mixing bowl, small sauce bowl, cutting board, knife, cheese grater, and food thermometer.
Ingredients
- 1 lb / 450 g lean ground beef
- 1 small onion, about 4 oz / 110 g, finely diced
- ½ teaspoon garlic powder
- ½ teaspoon smoked paprika
- ¼ teaspoon fine salt, plus more to taste
- ¼ teaspoon black pepper
- 1 tablespoon / 15 ml ketchup
- 2 teaspoons / 10 ml yellow mustard
- 4 soft flour tortillas, about 10 inches / 25 cm each
- 1½ cups / 170 g grated cheddar
- Optional: 2 tablespoons finely chopped dill pickles, blotted dry
- 2 teaspoons / 10 ml neutral oil, divided, plus a little more only if needed
Easy burger sauce
- ¼ cup / 60 g mayonnaise
- 1 tablespoon / 15 ml ketchup
- 1 teaspoon / 5 ml yellow mustard
- 1 tablespoon finely chopped dill pickle, blotted dry
- ¼ teaspoon smoked paprika
- Optional: ½ teaspoon pickle brine to thin
Instructions
- Mix the sauce. Stir mayonnaise, ketchup, mustard, chopped pickle, and paprika in a small bowl. Add optional brine only if needed. Cover and refrigerate while preparing the quesadillas.
- Cook the filling. Place beef and onion in the skillet over medium-high heat. Cook about 8–10 minutes, breaking the meat into small crumbles and stirring, until the onion softens and the beef reaches 160°F / 71°C. Drain excess fat carefully.
- Season. Reduce heat to medium. Stir in garlic powder, paprika, salt, pepper, ketchup, and mustard. Cook for about 1 minute until evenly coated. Transfer to a bowl. Let excess steam escape briefly while preparing tortillas; do not leave the filling out for prolonged cooling.
- Assemble. Divide cheese into eight equal portions. On one half of each tortilla, place one portion cheese, one quarter of the filling, optional chopped pickles, then another portion cheese. Leave a small border and fold the empty half over.
- Crisp in batches. Wipe the skillet if needed and heat over medium. Brush with half the oil. Add two folded quesadillas if they fit without overlapping. Cook about 2–3 minutes per side, adjusting the heat so the tortillas turn golden as the cheese melts. Repeat with remaining oil and quesadillas.
- Cut and serve. Rest on a rack for 1–2 minutes rather than stacking. Cut each into three wedges. Serve promptly with cold burger sauce, extra pickles, and a side of your choice.
How to keep cheeseburger quesadillas crisp
Begin with a filling that does not leave a pool of liquid in the bowl. If the beef was very fatty, draining makes a noticeable difference. Avoid pouring pickle brine or a large amount of dipping sauce inside. The tortilla can handle a lightly coated filling much better than a loose burger sauce mixture.
Use a thin film of oil in the pan, not enough to shallow-fry the folded tortilla. Too much fat can produce a greasy surface while insufficient heat leaves the tortilla pale. Medium heat gives the center time to warm and the cheese time to melt. If the outside darkens before the cheese softens, lower the burner rather than pressing harder.
After cooking, place the quesadillas on a rack or serve immediately. Stacking traps steam between them and softens the crisp surfaces. A brief rest also makes slicing cleaner because the melted filling settles slightly. Use a sharp knife or pizza cutter without crushing every wedge flat.
Filling amounts and batch planning
Divide the cooked beef into four portions before assembling. This is easier than estimating halfway through and discovering the last tortilla has almost no filling. Keep the layer relatively thin and even. Overstuffing makes flipping awkward and encourages beef to fall out before the cheese has a chance to hold everything together.
If you use eight smaller tortillas, make smaller folded portions and distribute the ingredients accordingly. Their cooking time may be shorter, but the larger number of batches can increase total time. A wide griddle is useful when feeding several people, provided you can control the heat and turn each portion safely.
To prepare a double batch, brown the meat in two rounds if the pan is crowded. A packed skillet tends to steam the beef rather than brown it. Keep the sauce separate and measure twice the ingredients, but do not assume every stage finishes in the original time. More portions usually require additional cooking space or batches.
Protein, cheese, and dietary swaps
| Swap | How to adapt | What changes |
|---|---|---|
| Ground turkey or chicken | Cook the filling to 165°F / 74°C; add a little oil if very lean. | A milder flavor and potentially drier filling. |
| Plant-based crumbles | Follow the product’s cooking instructions before assembling. | Salt, moisture, and browning vary by brand. |
| Monterey Jack | Replace part of cheddar in the same weight. | A gentler flavor and stretchier melt. |
| Gluten-free tortillas | Choose a flexible product and warm as directed. | Some crack or crisp more quickly than flour tortillas. |
For dairy-free cooking, use an appropriate melting cheese alternative and check the tortillas and sauce ingredients. Different products need different heat and may not bind the filling as firmly. For an egg allergy, replace mayonnaise with a suitable egg-free version; removing cheese alone does not address the mayonnaise in the dipping sauce.
Finely diced bell pepper or mushrooms can join the filling if cooked until their released water evaporates. Do not add a large quantity of raw watery vegetables inside just before folding. Keep lettuce, tomato slices, and avocado on the side, where they add freshness without steaming inside the tortilla.
Common problems and quick fixes
The quesadilla leaks while flipping
Use less filling, leave a border, and place cheese both below and above the meat. Slide a broad spatula under the folded portion and turn gently. A firmly folded edge is easier to manage than a full round tortilla sandwich. Avoid moving it repeatedly before the first side has had time to set.
The outside burns before the middle melts
The pan is probably too hot or the filling layer is too thick. Lower the heat and make the next quesadilla thinner. If necessary, briefly cover to help melt the cheese, then uncover and re-crisp the surface. A lid creates steam, so it is a short corrective step rather than the preferred entire cooking method.
The filling tastes bland
Taste the cooked beef before assembly and adjust its salt or mustard slightly. Remember that cheese, pickles, and sauce contribute their own seasoning. Do not taste raw ground meat. If the finished quesadilla needs brightness, offer extra pickles or a little dipping sauce rather than adding a large amount of salt to every component.
Serving ideas for an easy family dinner
Pair wedges with a simple chopped salad, carrot sticks, or roasted potato wedges depending on appetite. A little crunchy lettuce outside the quesadilla contrasts well with its warm filling. Serve sauce in a small individual bowl or drizzle it just before eating so the tortillas do not sit under a wet topping.
For other ground-beef dinners with different textures, try ginger beef lettuce wraps with water chestnuts or hot honey ground beef sweet potato skillet. These help build a dinner rotation from a larger meat purchase without repeating the same tortilla meal.
Make-ahead, freezing, and reheating
The filling can be cooked ahead and refrigerated promptly in a shallow container. Assemble close to cooking time for the crispest result. Keep sauce covered and refrigerated separately, using clean utensils. If using refrigerated filling, reheat it thoroughly to 165°F before assembling rather than relying on a very brief tortilla-crisping stage to heat a cold center.
Refrigerate cooked leftovers within two hours, or within one hour above 90°F / 32°C, and use within 3–4 days at 40°F / 4°C or below. Reheat in a skillet or oven until the center reaches 165°F. A microwave can warm the filling, but the tortilla will generally be softer than after dry-pan reheating.
For freezing, wrap cooked portions individually once promptly chilled and freeze for about two months for best quality. Thaw in the refrigerator and reheat thoroughly. Leave sauce and fresh toppings out of the freezer pack. Label portions so it is easy to take only what you need rather than thawing the whole batch.
Frequently asked questions
Can I use a different protein?
Ground turkey or chicken works if cooked to 165°F before assembly, though very lean meat may need a little oil. Cooked shredded chicken gives a different texture and should be chopped small for even filling. Plant-based crumbles are another option when prepared according to their package. Check salt and moisture before adding the cheese and folding.
How can I add vegetables without making them soggy?
Cook finely diced peppers or mushrooms with the filling until excess moisture evaporates. Keep the amount modest so the tortillas can still close easily. Fresh lettuce, tomato, and avocado work better alongside the finished wedges. Avoid wet salsa inside the tortilla; offer it as a dip if your family enjoys it with burger flavors.
Can I bake these instead of using a skillet?
You can use an oven for a different finish: arrange folded quesadillas on a lightly oiled tray and bake around 400°F / 200°C, turning carefully once, until crisp and hot. Begin checking around 8 minutes and continue as needed. Total time varies with tortillas and filling temperature; refrigerated leftovers must reach 165°F throughout.
What cheese melts best?
Cheddar gives the clearest cheeseburger flavor, while Monterey Jack makes the melt milder and stretchier. A mixture is useful if you want both. Grate the cheese finely and keep the filling layer thin so it melts before the tortilla burns. Very aged, dry cheeses may add flavor but are less suitable as the only melting component.
Can I pack these for lunch?
Yes, but expect less crunch after refrigeration. Chill portions promptly, keep them cold during transport, and pack sauce and fresh vegetables separately. Reheat thoroughly to 165°F when serving hot. If crispness is the priority, use a skillet or oven where available; a microwave is convenient but produces a softer tortilla.
Can I make these quesadillas lower-carb or keto-friendly?
Use a suitable lower-carb tortilla and check its label, since carbohydrate content varies considerably. Choose unsweetened pickles and adjust the ketchup and dipping sauce if needed. The full portion, filling, and side dishes determine the carbohydrate total; a tortilla swap alone does not guarantee keto suitability. A cheeseburger lettuce bowl is another option with a different texture.
Can I freeze quesadillas for quick dinners?
Yes. Cook them, refrigerate promptly, then wrap individual portions and freeze for about two months for best quality. Keep burger sauce, lettuce, and other fresh toppings separate. Thaw in the refrigerator and reheat until the center reaches 165°F / 74°C. A skillet or oven restores more crispness than a microwave, although the texture may differ from freshly cooked tortillas.
Food-safety reference
See FoodSafety.gov’s temperature chart for ground beef, poultry, and leftovers. This is a proposed culinary recipe; ingredient brands and pan sizes can change the timing and texture.
You might also like these recipes
Marry Me Chickpeas with Spinach and Sun-Dried Tomatoes
Chocolate Ricotta Protein Pudding Without Protein Powder
Savory Whipped Cottage Cheese with Dill: A Smooth Protein Snack